FACE01 GRAPHICS 1.2.5を外部から呼び出す
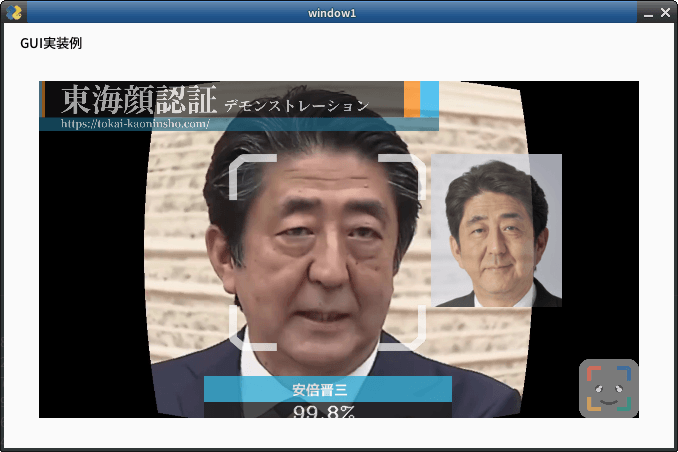
FACE01 GRAPHICS 1.2.5を外部から呼び出します。この時ウィンドウに映像が出力されるようにします。またメニーコアの恩恵を享受するため並行処理を行いたいと思います。実際のウィンドウのスクリーンショットが下図です。
コード
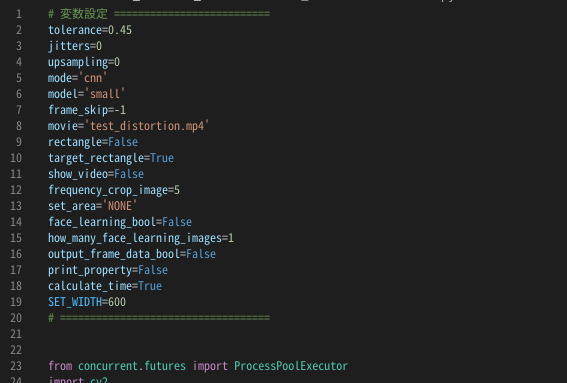
実際のコードは下記となります。コード先頭の変数設定ブロックに必要な設定を入力します。
# 変数設定 ==========================
tolerance=0.45
jitters=0
upsampling=0
mode='cnn'
model='small'
frame_skip=-1
movie='test_distortion.mp4'
rectangle=False
target_rectangle=True
show_video=False
frequency_crop_image=5
set_area='NONE'
face_learning_bool=False
how_many_face_learning_images=1
output_frame_data_bool=False
print_property=False
calculate_time=True
SET_WIDTH=600
# ===================================


from concurrent.futures import ProcessPoolExecutor
import cv2
import PySimpleGUI as sg
import FACE01GRAPHICS125 as fg

kaoninshoDir, priset_face_imagesDir = fg.home()

known_face_encodings, known_face_names = fg.load_priset_image.load_priset_image(
    kaoninshoDir,
    priset_face_imagesDir,
    jitters = 10,
    upsampling=0,
)

xs = fg.face_attestation(
    kaoninshoDir,
    known_face_encodings,
    known_face_names,
    tolerance=tolerance,
    jitters=jitters,
    upsampling=upsampling,
    mode=mode,
    model=model,
    frame_skip=frame_skip,
    movie=movie,
    rectangle=rectangle,
    target_rectangle=target_rectangle,
    show_video=show_video,
    frequency_crop_image=frequency_crop_image,
    set_area=set_area,
    face_learning_bool=face_learning_bool,
    how_many_face_learning_images=how_many_face_learning_images,
    output_frame_data=output_frame_data_bool,
    print_property=print_property,
    calculate_time=calculate_time,
    SET_WIDTH=SET_WIDTH
)

# window実装
layout = [
    [sg.Text('GUI実装例')],
    [sg.Image(filename='', pad=(25,25), key='cam1')]
]
window = sg.Window('window1', layout, alpha_channel=1)

# 並行処理
def multi(x):
    name, date, img, location, percentage_and_symbol = x['name'], x['date'], x['img'], x['location'], x['percentage_and_symbol']
    print(name, percentage_and_symbol, location, date)
    return img

pool = ProcessPoolExecutor()
for x in xs:
    # <DEBUG>
    if x=={}:
        continue
    result = pool.submit(multi, x)
    event, _ = window.read(timeout=1)
    if event == sg.WIN_CLOSED:
        break
    imgbytes=cv2.imencode(".png", result.result())[1].tobytes()
    window["cam1"].update(data=imgbytes)

# window close
window.close()
print('終了します')
動作の様子
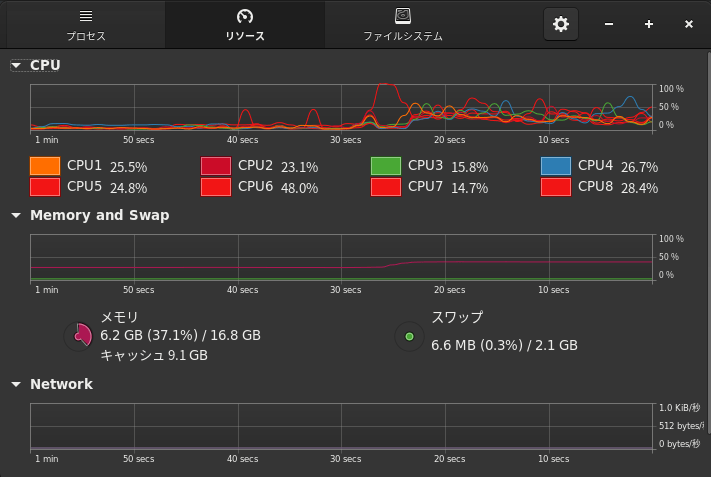
システムモニターを確認するとCPUが満遍なく使用されていることが確認できます。
まとめ
FACE01 GRAPHICSを呼び出す際、今回は処理を並行処理しました。Pythonは深く考えなくても簡単に並列・並行化出来るので便利だと思いました。実際のアプリケーションを構築する際は力を発揮するのではないでしょうか。
以上です。
最後までお読み頂きありがとうございました。

