画像拡大マスター:超解像セットアップシリーズ① SRGAN
超解像シリーズは全部で4編書きます。
1. MAX Image Resolution Enhancer
2. GFPGAN
3. VQFR
4. 1~3の比較
この超解像シリーズでは、いくつかの超解像技術をピックアップして、それぞれの環境構築方法を中心にご紹介します。
今回は、IBMのMAX Image Resolution Enhancerです。
GPUを必要とせず、CPUだけで処理できますので、ぜひ試してみて下さい。

目次
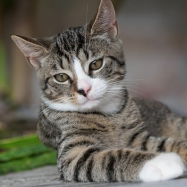
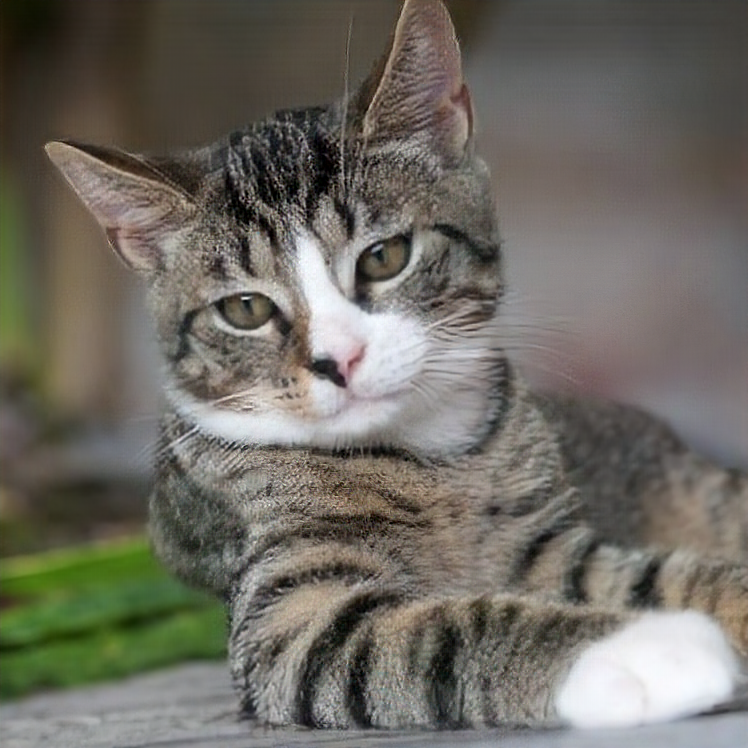
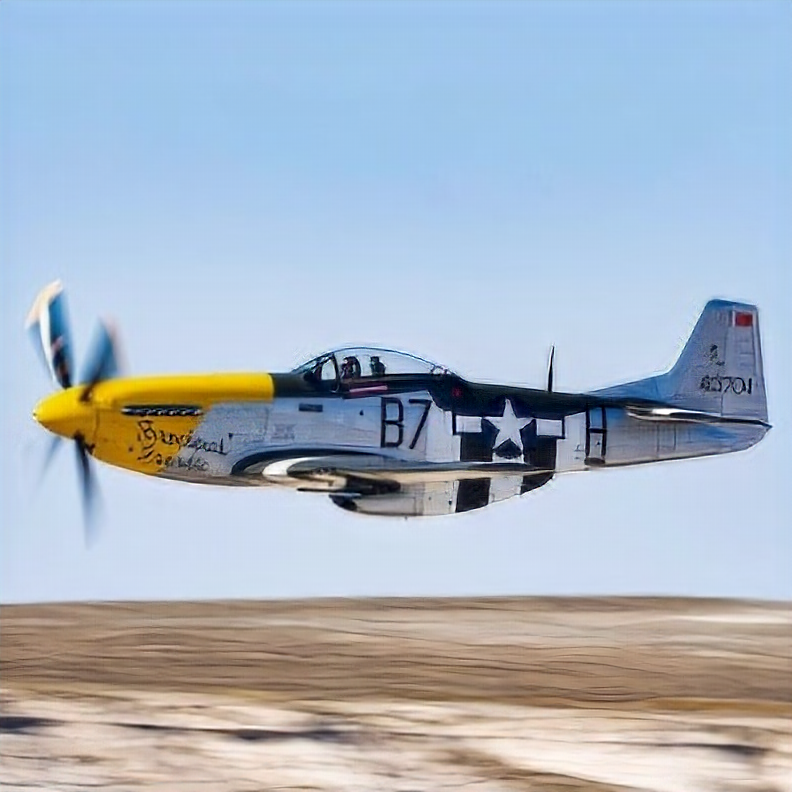
出力結果
一般的な物体に対して、非常に良い結果を得ることができます。スケールはx4固定です。
元画像
超解像画像
SRGAN(Super-Resolution Generative Adversarial Network)とは
リポジトリ
https://github.com/IBM/MAX-Image-Resolution-Enhancer/tree/master
論文
https://arxiv.org/pdf/1609.04802.pdf
主なポイント:
- 問題設定: 低解像度(Low-Resolution, LR)の画像から高解像度(High-Resolution, HR)の画像を生成することは、多くの応用がありますが、大きな拡大率でのテクスチャの詳細の回復は難しい。
- 従来の手法: これまでの研究では、Mean Squared Error(MSE)を最小化することが一般的でしたが、これは高周波の詳細を失う傾向があります。
- SRGANの提案: 著者らは、敵対的損失(Adversarial Loss)と内容損失(Content Loss)を組み合わせた新しい損失関数を提案しています。これにより、4倍の拡大率でも写真のような自然な画像を生成できるとされています。
- 評価: Mean Opinion Score(MOS)テストを用いて、SRGANが他の先進的な手法よりも優れた知覚品質を達成していることが示されました。
ホスト環境
$ nvcc --version
nvcc: NVIDIA (R) Cuda compiler driver
Copyright (c) 2005-2023 NVIDIA Corporation
Built on Fri_Jan__6_16:45:21_PST_2023
Cuda compilation tools, release 12.0, V12.0.140
Build cuda_12.0.r12.0/compiler.32267302_0

$ nvidia-smi
Fri Oct 20 18:38:04 2023
+-----------------------------------------------------------------------------+
| NVIDIA-SMI 525.85.12    Driver Version: 525.85.12    CUDA Version: 12.0     |
|-------------------------------+----------------------+----------------------+
| GPU  Name        Persistence-M| Bus-Id        Disp.A | Volatile Uncorr. ECC |
| Fan  Temp  Perf  Pwr:Usage/Cap|         Memory-Usage | GPU-Util  Compute M. |
|                               |                      |               MIG M. |
|===============================+======================+======================|
|   0  NVIDIA GeForce ...  On   | 00000000:08:00.0  On |                  N/A |
| 41%   38C    P8    13W / 120W |    842MiB /  6144MiB |      5%      Default |
|                               |                      |                  N/A |
+-------------------------------+----------------------+----------------------+

$ inxi -SGm
System:    Host: user Kernel: 5.15.0-86-generic x86_64 bits: 64 Desktop: Gnome 3.36.9
           Distro: Ubuntu 20.04.6 LTS (Focal Fossa)
Memory:    RAM: total: 15.55 GiB used: 8.42 GiB (54.2%)
           RAM Report: permissions: Unable to run dmidecode. Root privileges required.
Graphics:  Device-1: NVIDIA TU116 [GeForce GTX 1660 Ti] driver: nvidia v: 525.85.12
           Display: x11 server: X.Org 1.20.13 driver: fbdev,nouveau unloaded: modesetting,vesa resolution: 2560x1440~60Hz
           OpenGL: renderer: NVIDIA GeForce GTX 1660 Ti/PCIe/SSE2 v: 4.6.0 NVIDIA 525.85.12
注意点
私の環境ではnvidia-docker2がインストールされていないと正常に動作しませんでした。
sudo apt install nvidia-docker2ローカル環境構築
コンテナの作成
まず、MAX Image Resolution Enhancerの環境構築を始めるには、GitHubからリポジトリをクローンします。以下のコマンドを使ってリポジトリをローカルにコピーします。
git clone https://github.com/IBM/max-image-resolution-enhancer.gitこのコマンドを実行すると、max-image-resolution-enhancerという名前のディレクトリが作成され、その中にリポジトリの内容がコピーされます。
次に、コマンドラインでmax-image-resolution-enhancerディレクトリに移動します。
cd max-image-resolution-enhancerディレクトリを変更することで、このプロジェクトのルートディレクトリ内で作業する準備が整いました。
最後に、Dockerを使用してプロジェクトの環境を構築します。以下のコマンドを実行して、Dockerイメージをビルドします。
sudo docker build -t max-image-resolution-enhancer .このコマンドは、現在のディレクトリ(.)のDockerfileを使用して、max-image-resolution-enhancerという名前のDockerイメージをビルドします。ビルドが完了すると、このイメージを使用してDockerコンテナを起動し、MAX Image Resolution Enhancerの環境を利用できるようになります。
ネットワークの設定
続いて、環境のファイアウォール設定をします。
まず、sudo ufw allow from 192.168.0.1 to any port 5000 proto tcp コマンドを使って、特定のIPアドレス(192.168.0.1)からのTCPプロトコルによるポート5000へのアクセスを許可するルールを追加しました。このルールは、ネットワーク上の特定のマシンからの接続を許可し、MAX Image Resolution EnhancerのAPIエンドポイントにアクセスできるようにするためのものです。
sudo ufw allow from 192.168.0.1 to any port 5000 proto tcp
ルールを追加しました次に、sudo ufw status コマンドを実行して、現在のファイアウォールの状態とルールを確認しました。このコマンドの出力から、ファイアウォールはアクティブであり、以前に設定されたいくつかのルールが存在し、そして新しく追加したルールが正しく表示されていることが確認できます。
sudo ufw status
状態: アクティブ

To                         Action      From
--                         ------      ----

5000/tcp                   ALLOW       192.168.0.1
特定のIPアドレスからのポート5000へのアクセスが許可され、MAX Image Resolution EnhancerのAPIにアクセスできるようになりました。
これで、MAX Image Resolution Enhancerの基本的なセットアップが完了しました。これにより、低解像度の画像を高解像度に変換する作業を始めることができます。
コンテナの起動
主メモリーは10GBに設定しています。READMEには「最低8GB必要」となっています。なおGPUは使っていません。
$ docker run --memory=10g -it --network bridge -p 5000:5000 max-image-resolution-enhancer
2023-10-21 01:00:17.194788: W tensorflow/stream_executor/platform/default/dso_loader.cc:64] Could not load dynamic library 'libcudart.so.11.0'; dlerror: libcudart.so.11.0: cannot open shared object file: No such file or directory
2023-10-21 01:00:17.194826: I tensorflow/stream_executor/cuda/cudart_stub.cc:29] Ignore above cudart dlerror if you do not have a GPU set up on your machine.
/opt/conda/lib/python3.7/site-packages/tensorflow/python/keras/engine/base_layer_v1.py:1694: UserWarning: `layer.apply` is deprecated and will be removed in a future version. Please use `layer.__call__` method instead.
  warnings.warn('`layer.apply` is deprecated and '
WARNING:tensorflow:From /opt/conda/lib/python3.7/site-packages/tensorflow/python/util/deprecation.py:617: calling map_fn_v2 (from tensorflow.python.ops.map_fn) with dtype is deprecated and will be removed in a future version.
Instructions for updating:
Use fn_output_signature instead
2023-10-21 01:00:20.216461: W tensorflow/stream_executor/platform/default/dso_loader.cc:64] Could not load dynamic library 'libcuda.so.1'; dlerror: libcuda.so.1: cannot open shared object file: No such file or directory
2023-10-21 01:00:20.216505: W tensorflow/stream_executor/cuda/cuda_driver.cc:269] failed call to cuInit: UNKNOWN ERROR (303)
2023-10-21 01:00:20.216551: I tensorflow/stream_executor/cuda/cuda_diagnostics.cc:163] no NVIDIA GPU device is present: /dev/nvidia0 does not exist
2023-10-21 01:00:20.375704: I tensorflow/core/platform/cpu_feature_guard.cc:142] This TensorFlow binary is optimized with oneAPI Deep Neural Network Library (oneDNN) to use the following CPU instructions in performance-critical operations:  AVX2 FMA
To enable them in other operations, rebuild TensorFlow with the appropriate compiler flags.
 * Serving Flask app "MAX Image Resolution Enhancer" (lazy loading)
 * Environment: production
   WARNING: This is a development server. Do not use it in a production deployment.
   Use a production WSGI server instead.
 * Debug mode: off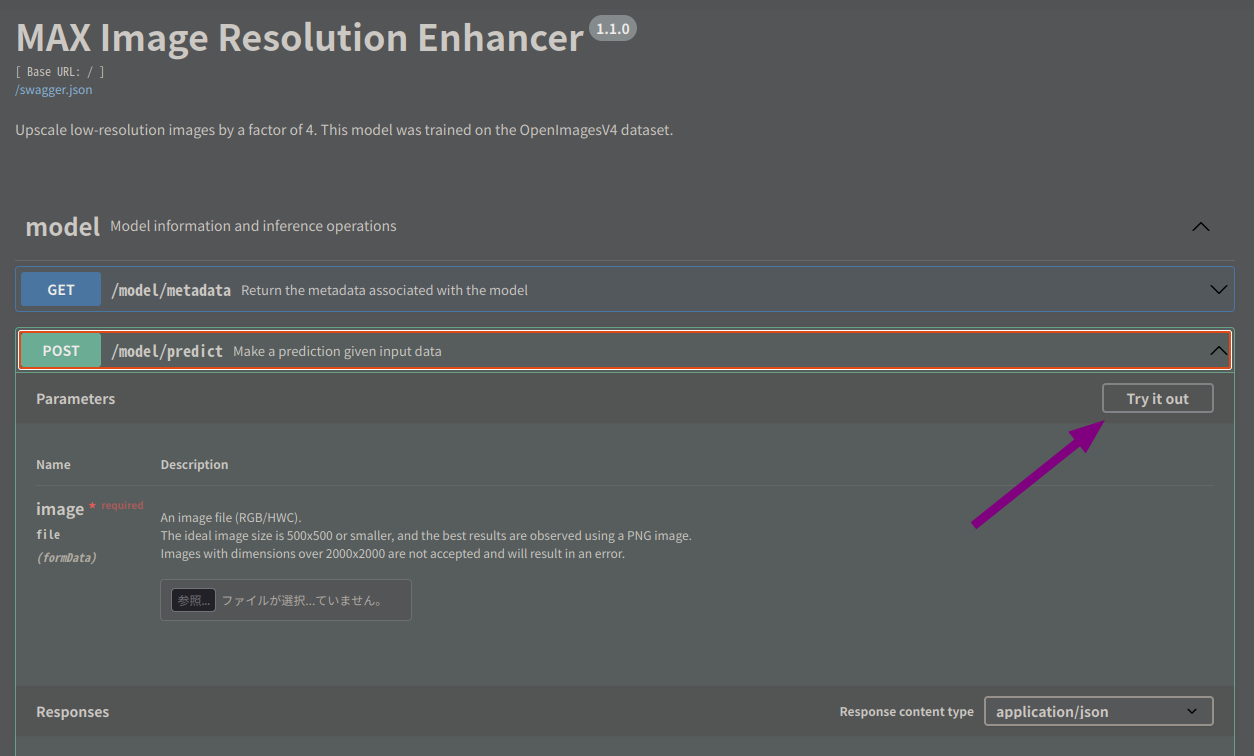
* Running on http://0.0.0.0:5000/ (Press CTRL+C to quit)ブラウザからhttp://0.0.0.0:5000/にアクセスすると、以下のような画面が表示されます。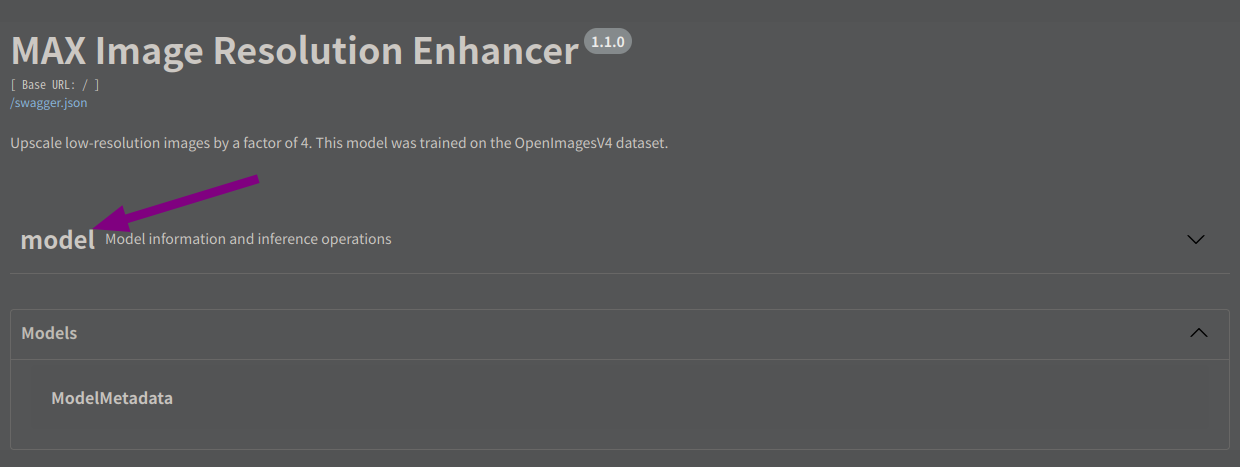
まとめ
SRGANを用いたMAX Image Resolution Enhancerのローカル環境構築と、その結果を確認しました。
以上です。ありがとうございました。